Dr. Michael Katz - Porous Materials
Thesis Formatting
Whether it is your honours thesis, your MSc thesis, or your PhD thesis, there are a few tricks and tips in word that may make your life easier. While universities may have templates (or at least should), it is possible that some of the tools you want may not have clear instruction. I hope that this helps you with your thesis writing. Have some suggstions? then reach out. We are always looking to add features that help you.
The Non-breaking Space and the Non-breaking Hyphen.
Sometimes you want to use a space between two elements but you still want to treat those two elements as a singular element. Similarly, sometimes you want to use a hyphen between two elements but you still want to treat those two elements as a singular element. By treating two elements as a singular element, the two components will always apear on the same line as one another. To accomplish this, you want to use a non-breaking space or a non-breaking hyphen, respectively. In word (PC as of early 2025), this can be done by typing "ctrl+shift+space" for a non-breaking space or "alt-shift+hyphen" for a non-breaking hyphen.
This begs the question as to when you would want to use these elements. One example is for quantities and units. For example, if I weigh out 5 g of something, then "5 g" is a singlular element. As such, a non-breaking space should be used so that these elements stay on the same line. Similarly "Dr. Katz" should be treated as a singular element and a non-breaking space should be used between "Dr." and "Katz". Non-breaking hyphens are ideal for chemical formulas where you want to keep the chemical name together (e.g., 1,4-benzenedicarboxylate should have a non-breaking hyphen).
There are other keyboard shortcuts that can be found (or if you are using a mac and trying to sort the non-breaking space/hyphen out). Simply go to the "Insert" tab in word, select "Symbol" on the far right hand side, select "More Symbols", and then select the "Special Characters" Tab.
Working with Headings.
Why should I use Heading?
You want to use headings in your thesis. If you use words heading correctly, then word will know how to make your table of content. Otherwise, you will have to make your table of content by hand and this is neither fun or ideal.
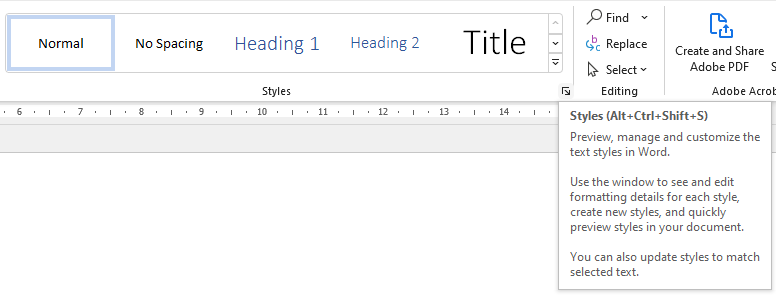
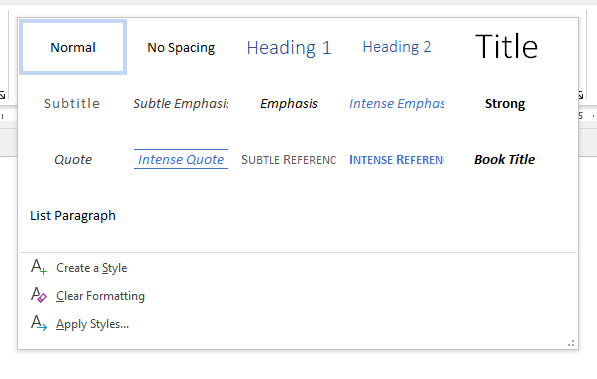
In the Figure above, you will see the styles section of your word document. Below you will see the expanded style bar in word. This is the default styles that word has. Heading 1 is your primary heading (Chapter 1, Chapter 2, Appendix A, Abstract, etc.). Heading 2 is your subheadings (Section 1.1, Section 1.2, Section A.1, etc.). As you can imagine, Heading 3 is for you sub-subheadings (Section 1.1.1, Section 1.1.2, etc.).
The challenge with word headings is that the default may not be what you want it to look like. The blue 16pt font is not for everyone. You can change this. Start by writing out a word and formatting it with the appropriate font, colour, and size. For example, for my Chapter titles, I want 18pt Times New Roman and bold. To do this, I do the following:
- Write a word (e.g., "Introduction") in your word document.
- Set the font (e.g., "Times New Roman").
- Set the font size (e.g., "18pt").
- Set the font attribute (e.g., "Bold").
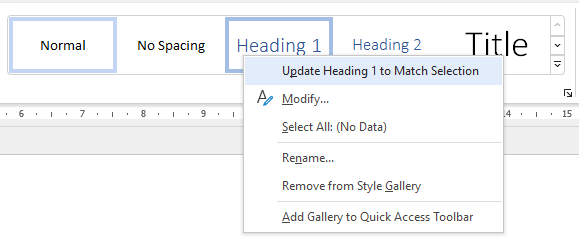
Once you have set this, select the word, right click on "Heading 1" in your styles and select "Update Heading 1 to Match Selection" (see Figure Below). Repeat this process for all the headings you are using (i.e., Heading 2, Heading 3, Heading 4, and even Caption for your figure/table captions.
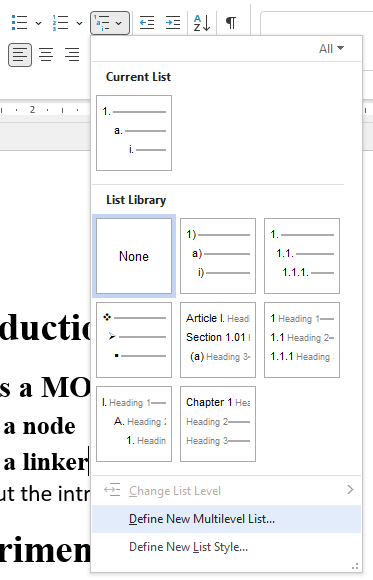
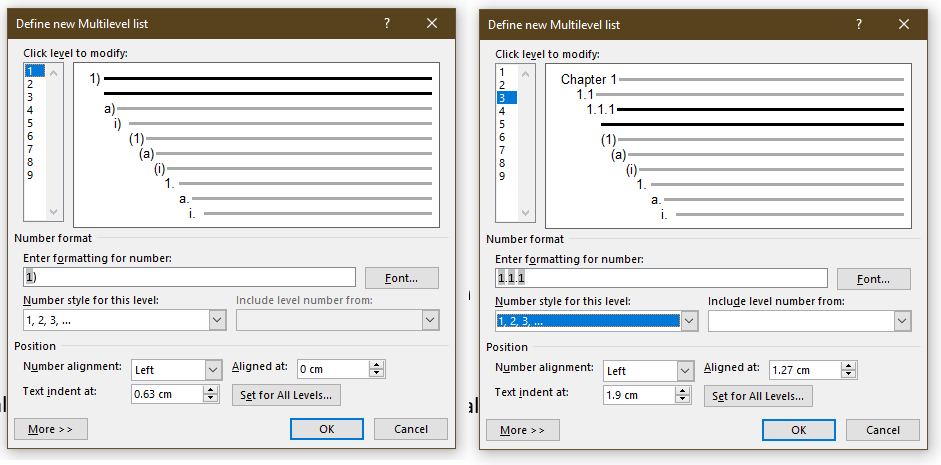
You may want your chapter name to be "Chapter 1 Introduction" and your subheadings to be "1.1 What is a MOF" and your sub-subheading to be "1.1.1 What is a node". To do this, start by defining a new multilevel list (see Figure).
You will get a new window (see Figure below) that shows up. In this window, you can define how you want each heading to appear in your thesis. For each list level, you can define the formatting. For example:
- To change Heading 1 to say "Chapter 1":
- Select level 1 from the top left hand selection.
- In the area that says "Enter Formatting for number:" type "Chapter".
- In the "Number style for this level:" select "1, 2, 3, ...".
- Select ok if you are done.
- To change Heading 2 to say "X.Y" (Where X referes to the chapter number and Y refers to the subheading number):
- Select level 2 from the top left hand selection.
- Clear the area that says "Enter Formatting for number:".
- In the area that says "Include level number from:" select "Level 1".
- Add a period after the 1 in "Enter formatting for number:"
- In the "Number style for this level:" select "1, 2, 3, ...".
- Select ok if you are done.
- To change Heading 3 to say "X.Y.Z" (Where X referes to the chapter number and Y refers to the subheading number and Z refers to your sub-subheading number):
- Select level 3 from the top left hand selection.
- Clear the area that says "Enter Formatting for number:".
- In the area that says "Include level number from:" select "Level 1".
- Add a period after the 1 in "Enter formatting for number:"
- In the area that says "Include level number from:" select "Level 2".
- Add a period after the 1 in "Enter formatting for number:"
- In the "Number style for this level:" select "1, 2, 3, ...".
- Select ok if you are done.
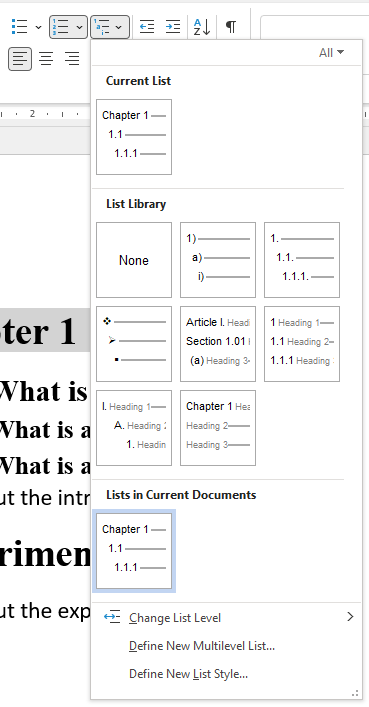
You can also change your font, font size, and font attribute for this (select the "Font" Button). I would keep the same font, font size, and font attribute that you use in your heading definition. You can also change your indentation and alignment to fit your requirements (Edit in the Position section at the end). When you are done, you should see a new list (see Figure below).
Now every time you create a heading, you can set the new custom list you created (see Figure below). If your sub-heading are coming out as "Chapter 2", then just click onto the word "Chapter 2" and use the tab to shift from section to sub-section, or shift+tab to shift from sub-section to section.
Working with Figure/Table Captions.
Why should I use Figure/Table captions?
If you reference and cross-reference your figures and tables, it makes it easier to add new figures/tables in the middle of your document and it makes it easier to create a list of figures and list of tables.
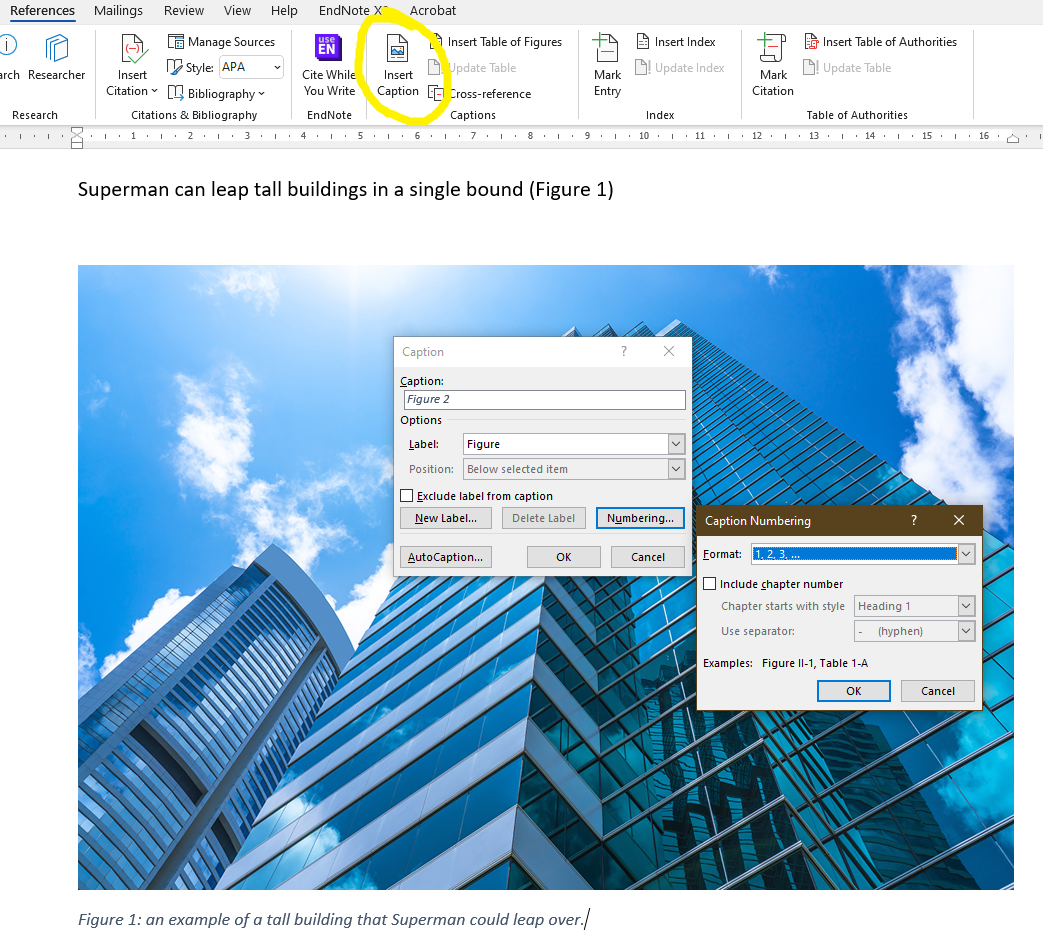
Once you have inserted your figure or made your table, you need to add a caption. Under the "References" tab, you will see the "Insert Caption button". When you click on it, you will see the Caption dialogue box. Here you can select if it's a Figure/Table/Equation, or you can create a "New Label". You can select your numbering style. Once you are happy with your caption you can insert it by clicking "OK". Note that you don't have to type in the caption here. you can just insert "Figure 1" and then add the text afterwards.
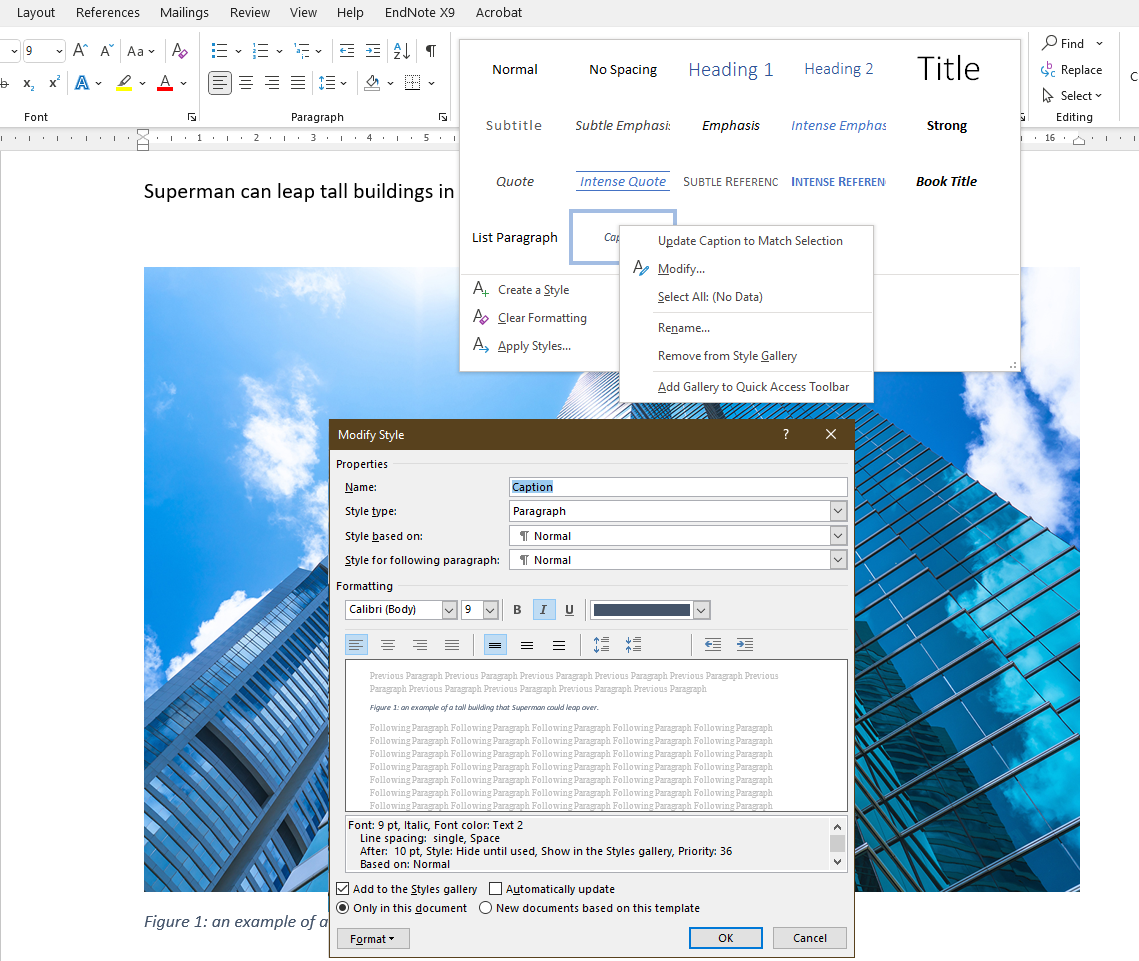
If you don't like the default font size/colour/etc for Figure or Table captions, then under the "Home" tab, you can right click on the caption style, and select "Modify". This will bring up the "Modify Style" dialogue. You can now change the formatting style to the style you want, and then select "Automatically update" (if you wish) or click ok and then select the figure caption and then click Caption in the styles tab.
Alternatively, you can format the caption text as you would want, and use the "update Caption to Match Selection" option when you right click on "caption" in the styles sheet. The Figure below demonstrates these options.
Now that you have a Figure/Table caption in your document, you want to insert a reference to it inside the main text. This will help ensure that if you add new Figures/Tables, then you won't accidently point your reader to "Figure 2" when you meant "Figure 3".
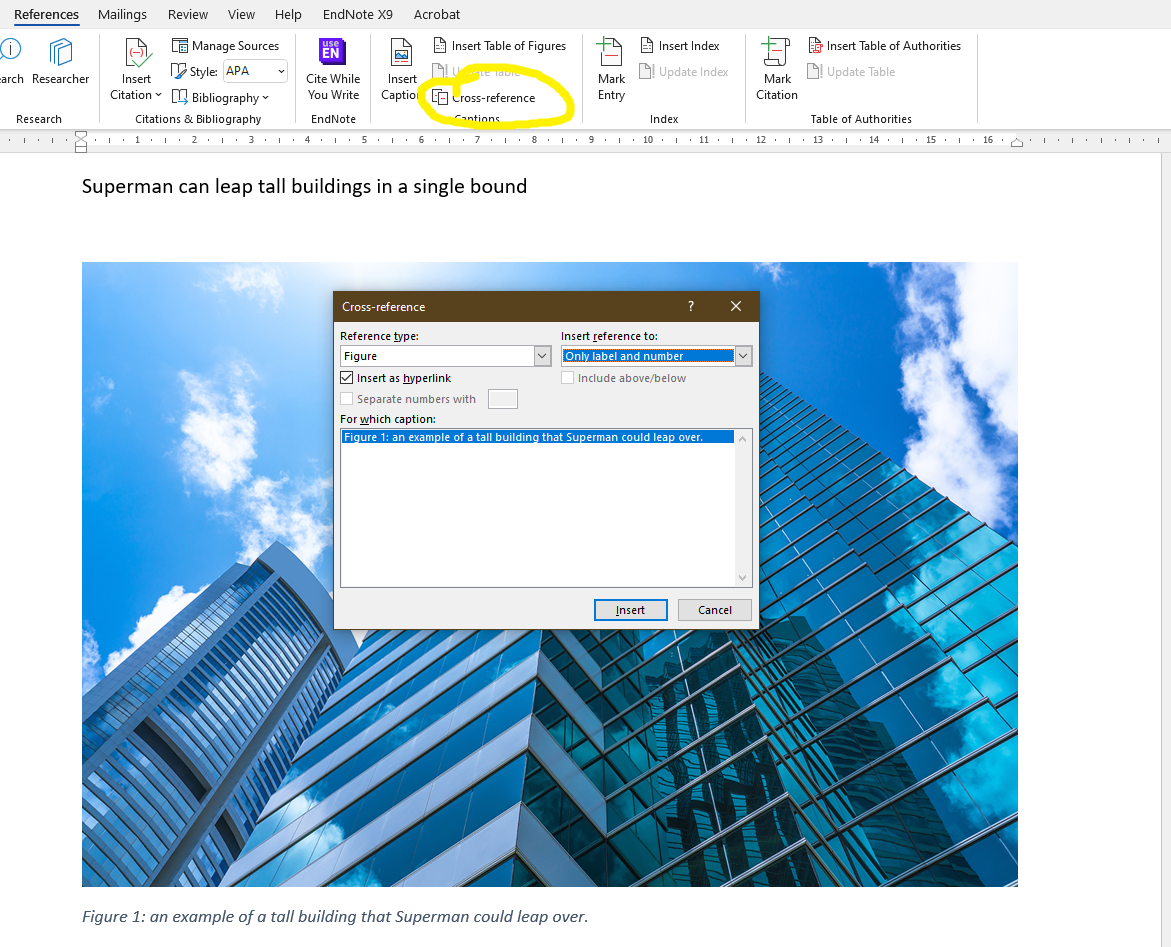
In the "References" tab, select cross-reference. This will bring up the "cross-reference" dialogue box. Under reference type, select Figure/Table (or other if you have other types of references) and then select "only label and number" for your "insert reference to:" option. This will ensure that the text will only include the word "Figure 1" and not "Figure 1: an example of a tall building that Superman could leap over." Then click insert and your cross reference is complete.
Now that you have completed your document, you may want to add a Table of Tables or a Table of Figures (i.e., a table of content for your tables/figures). If you have captioned all your figures/tables correctly, then this is easy.
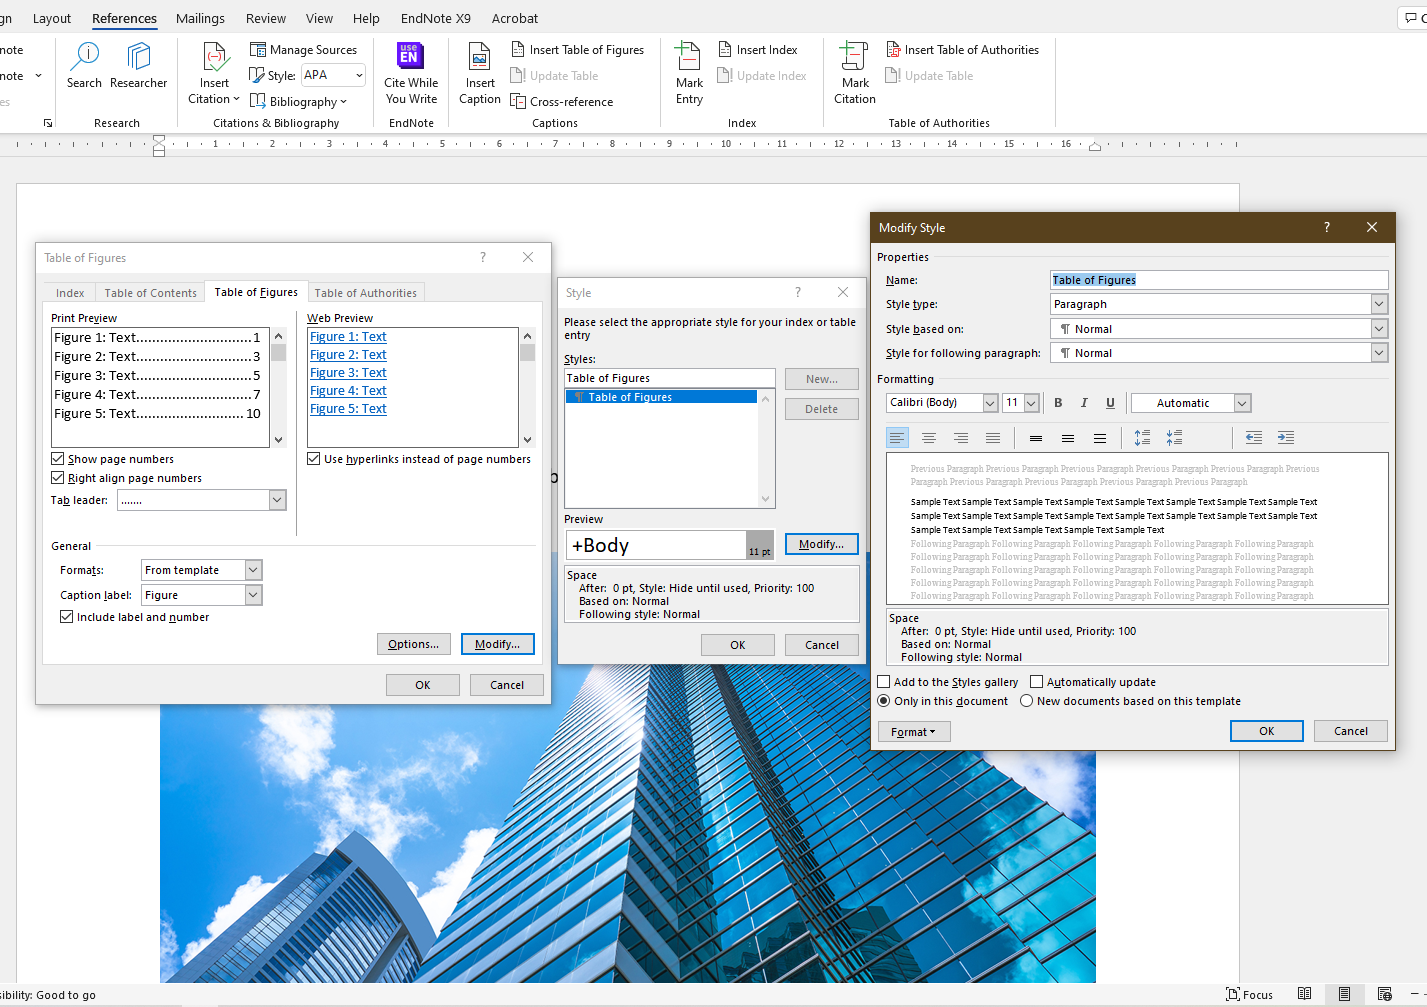
In the "References" tab, select "Insert Table of Figures". This will bring up the "Table of Figures" dialogue box. You edit how the table of figures will be formatted here. You can select "Figure" or "Table" from the "Caption label" box in order to create a list of tables or figures. If you want to modify the title of the table, then click on Modify and that will give you control over the formatting of the table of content. Once you click ok, a table of Figures/Tables will be created.
If you make changes to your text and a figure is added/removed or shifted to a differnt page, then you can right click on the table and select "Update Field" and then "update entire table." This will update the caption and the page number. I prefer doing this in case you change a caption but forget.

Your main text contains Figure/Table captions that contain a lot of information. For your Table of Figures or Table of Tables, you may want to have a shortened version of your caption. This will help the reader know what the Figure/Table is about without getting all the details that require the Figure/Table itself. This can be easily done.
Let's assume that you have a figure caption that is "Figure 1.1: This is my dog. My dog has two eyes, floppy ears, a nose, and is yellow." In your Table of Figures, you want the caption to state "Figure 1.1: This is my dog." To accomplish this, select the words that you don't want to show up in the Table of Figures ("My dog has two eyes, floppy ears, a nose, and is yellow." in this example.) Right click and select "Font". In the font menu under "Effects" you will see "Hidden". Select "Hidden" and then click OK. Now, your Table of Figures will simply state "Figure 1.1: This is my dog."

Some tables are longer than can fit on one page. For the reader, you want to make sure that it's easy to recall what the headings are. There is an easy way to repeat the headings (or other information) from one page to the next.
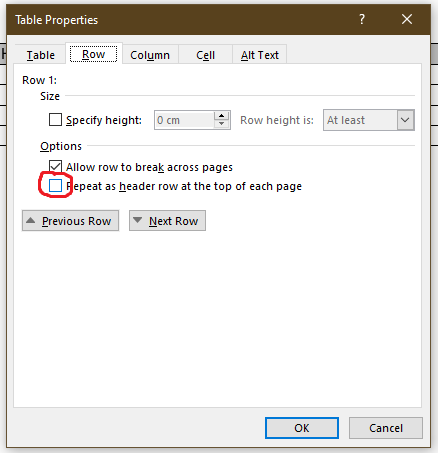
In your table, select the rows that you want to repeat at the top of each page. Right click on the table and select "Table Properties".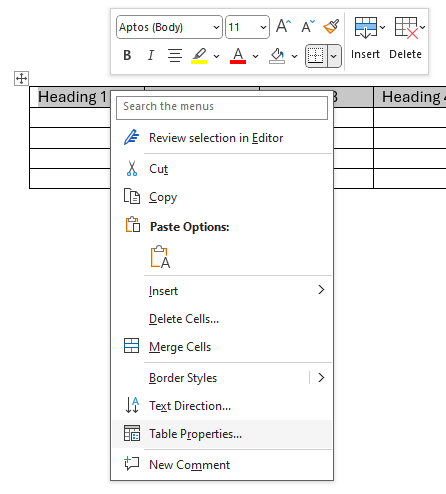
In the "Row" tab, click on "Repeat as header row at the top of each page."
Page Numbers
For your frontmatter — the pages that contain all the content before page 1 — are numbered using roman numerals starting with i. The body of the document is numbered using arabic numerals and it starts with the number 1.
In order to apply page numbers correctly, we need to start by sectioning off the document. You want your title page to be one section, your frontmatter to be one section, and the remaining document to be the third section; there may be reasons to have additional sections. A section break is different than a page break. A page break simply says "I want to end this page here". A section break says "all the content after this page belongs to a different collection for this document."
Start by going to the end of a section. This could be the bottom of your title page, or the start of your frontmatter. It could also be the end of your frontmatter, or the start of Chapter 1. From the Layout tab, select "Breaks" and then select "Next page" in the "section" portion. This will section off the different parts.

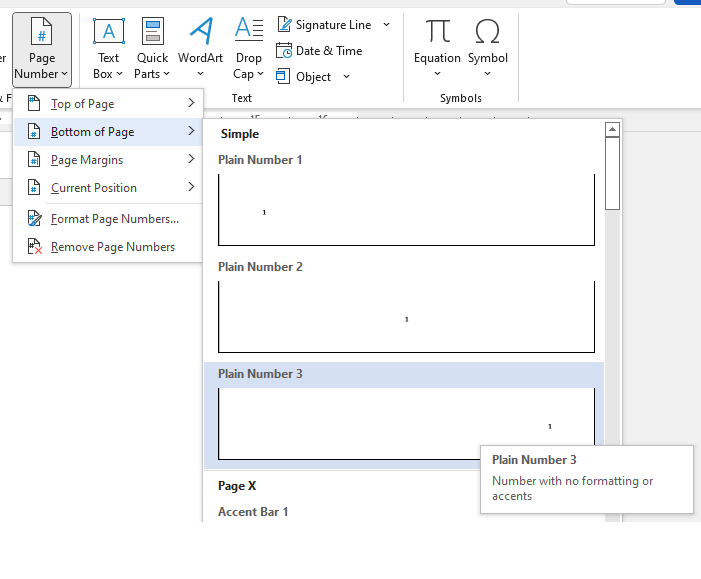
Now that you have sectioned off your thesis, we can add page numbers. Under the "Insert" tab, you will find the "page number" option. Select your favourite type of page number. I prefer bottom right hand corner, which I assume is what you want to do.
We now want to format our page numbers.
To change the frontmatter to roman numerals, select the page number, right click on the page number, and click on "Format Page Numbers". You should now be able to select roman numerals from the "Number Format" box. You should be able to select "Start at" and put in the number 1 in the box. This will start the current section at page 1, or page i in roman numerals.
To change the body of the thesis to Arabic Numbers, select the page number, right click on the page number, and click on "Format Page Numbers". You should now be able to select arabic numerals from the "Number Format" box. You should be able to select "Start at" and put in the number 1 in the box. This will start the current section at page 1.
For the title page, you don't want a page number. However, if you delete the page number in the first section, then all the page numbers get deleted. Instead, go to the first page of your thesis, select the page number in the footer (you may have to double click to get into the footer. Now, in the "Header & Footer" tab, select "Different First Page". Now the firs page of that section will not have a page number.
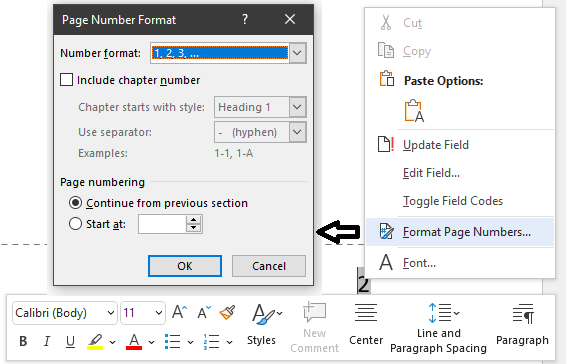
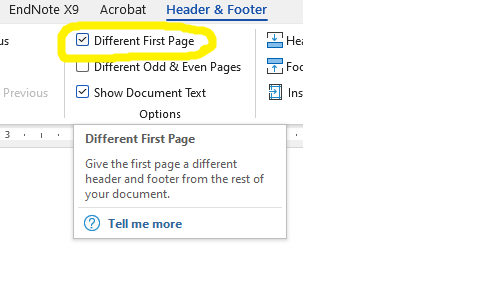
Table of Content
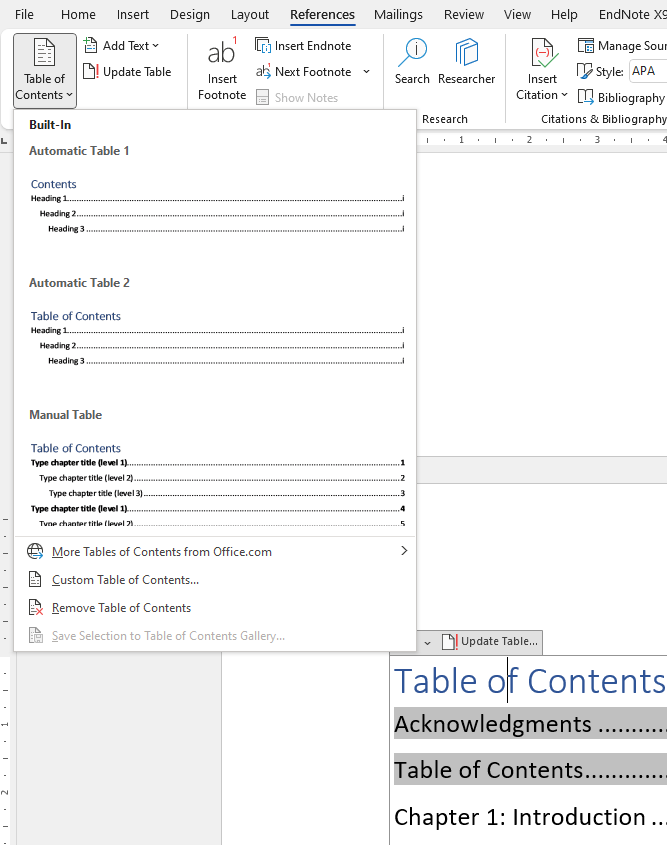
To insert a table of content, go to the part of your document where you want to insert the table of content. this is usually somewhere in your frontmatter. In the "References" tab, select "Table of Content" and select the type of table of content you want. If you want the table of content to show up as an item in your table of content, then select the title of your table of content and select "Heading 1" from the "styles" section in your "Home" tab. To update your table, click on "Update table" and select "Update entire table".
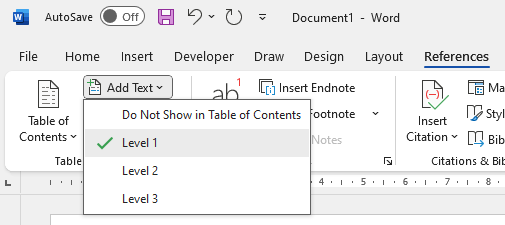
You may want to include a heading in your table of content, or you may want to remove an item from your table of content. For example, you may want your thesis title to have a title style but not end up in the table of content. Similarly, you may not want 'heading 4' in your table of content. You can add/remove or change the indentation of an item in your table of content by selecting the item in question (e.g., your title), going to the "References" tab and selecting "Add Text". You can change how the item appears in your table of content.
Could not find the answer?
The web page is always evolving. The aim is to take my students questions regarding thesis/document formatting and make a help section here for all. If you don't see the answer that you are looking for, then drop us an e-mail or check back frequently. Alternatively, if your students have a common question that you think should have an answer here, then drop us an e-mail or Twitter with the question and a solution and I'll do my best to post it in a timely fashion.
Contact Details
Department of Chemistry,
Memorial University,
St. John's, NL
Canada
Phone: 1-709-864-8745
Email:
mkatz@mun.ca
Website:
www.KatzResearchGroup.com
© 2025 Michael J. Katz